Same open-source software, same air-gapped principle — but with a 2-inch display you can read without glasses, a D-pad instead of the fiddly joystick, USB-C power and a microSD slot that clicks. We print and assemble the SeedSigner+ in Germany. Take it fully built and tested, or build it yourself in half an hour from the kit — no soldering.
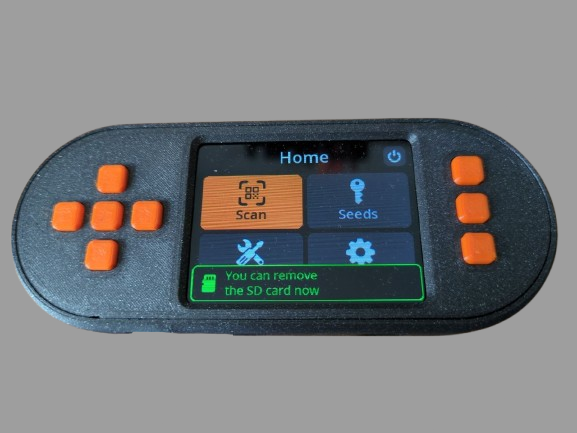
Both ship without a microSD card and without the software image — on purpose. You download SeedSigner from github.com/SeedSigner, verify the signature and flash your own card, so the chain of trust ends with you, not with us.
| SeedSigner+ · fully assembled |
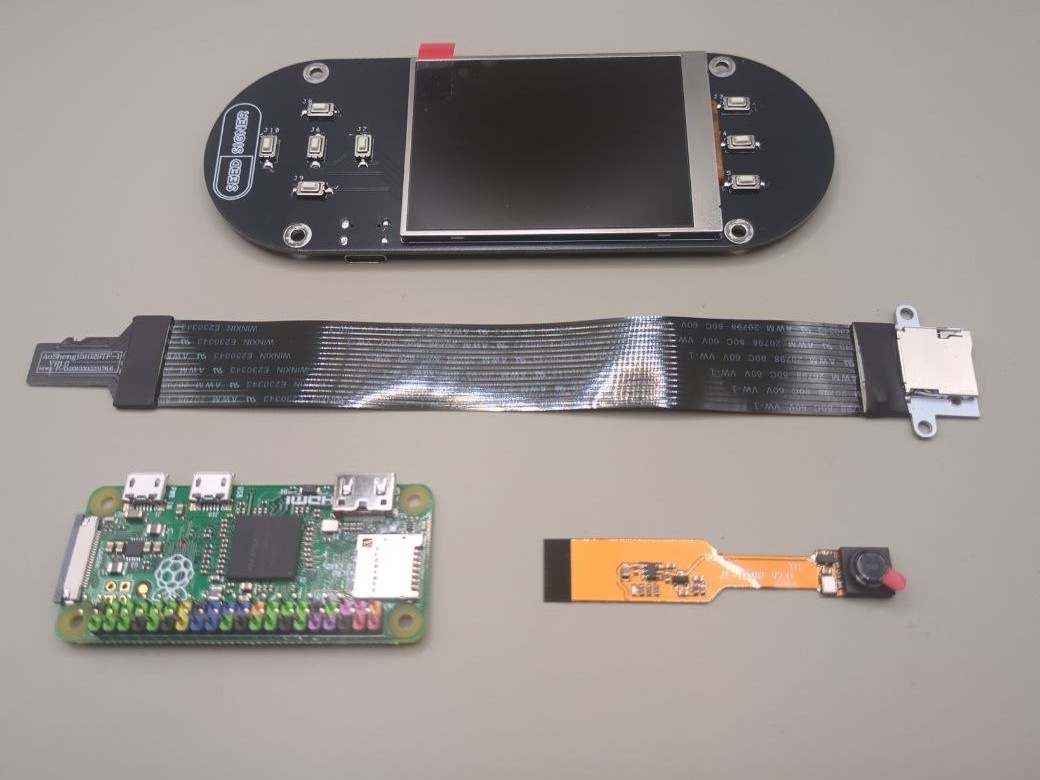 SeedSigner+ · DIY kit |
|
|---|---|---|
| Price | from 149.00 € | 125.00 € |
| Your work | None. Unbox, flash your card, start. | About 30 minutes with a small screwdriver. No soldering iron — the header on the Pi Zero is already soldered. |
| Tested before shipping | ✓ powered up, display, camera and D-pad checked | Parts are checked; the first boot is yours |
| Colours | Orange or black | Black/orange |
| You have seen the inside | Only if you open it | ✓ every part passed through your hands |
| Electronics | SeedSigner+ PCB with 2-inch display, D-pad and three buttons · Raspberry Pi Zero 1.3 (no Wi-Fi, no Bluetooth) · Pi camera with ribbon cable · USB-C power only, data lines not connected · spring-loaded microSD slot | |
| Software | Official SeedSigner image, flashed by you. No card, no image in the box — with either option. | |
| Best for | Anyone who just wants to use it — and for parents or grandparents who find the small SeedSigner too fiddly. | Anyone who wants to know exactly what is inside the device that signs their Bitcoin. |
| To the product → | To the kit → | |
Prices are live from the shop. Bitcoin payments through our own BTCPay Server get 7 % off either option.
What has not changed: the Raspberry Pi Zero 1.3 inside has no Wi-Fi and no Bluetooth, the device keeps nothing when powered off, and every exchange with your wallet is a QR code. The SeedSigner+ runs the standard SeedSigner firmware — no fork, no custom build.
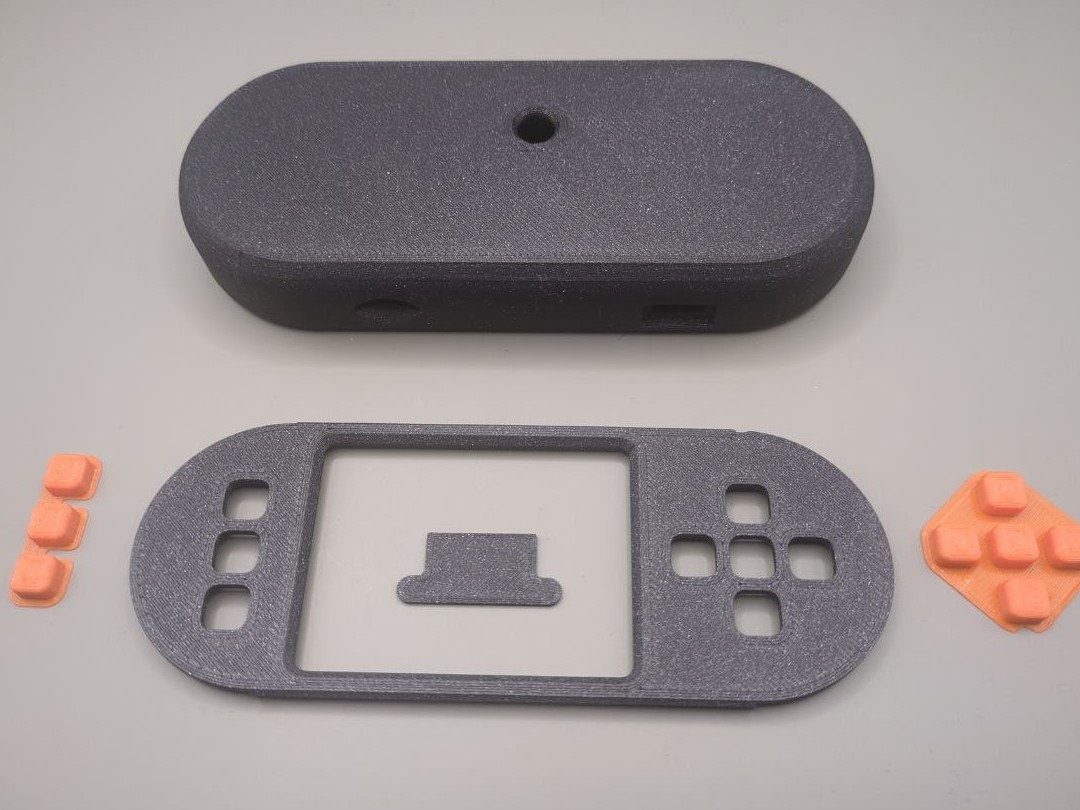
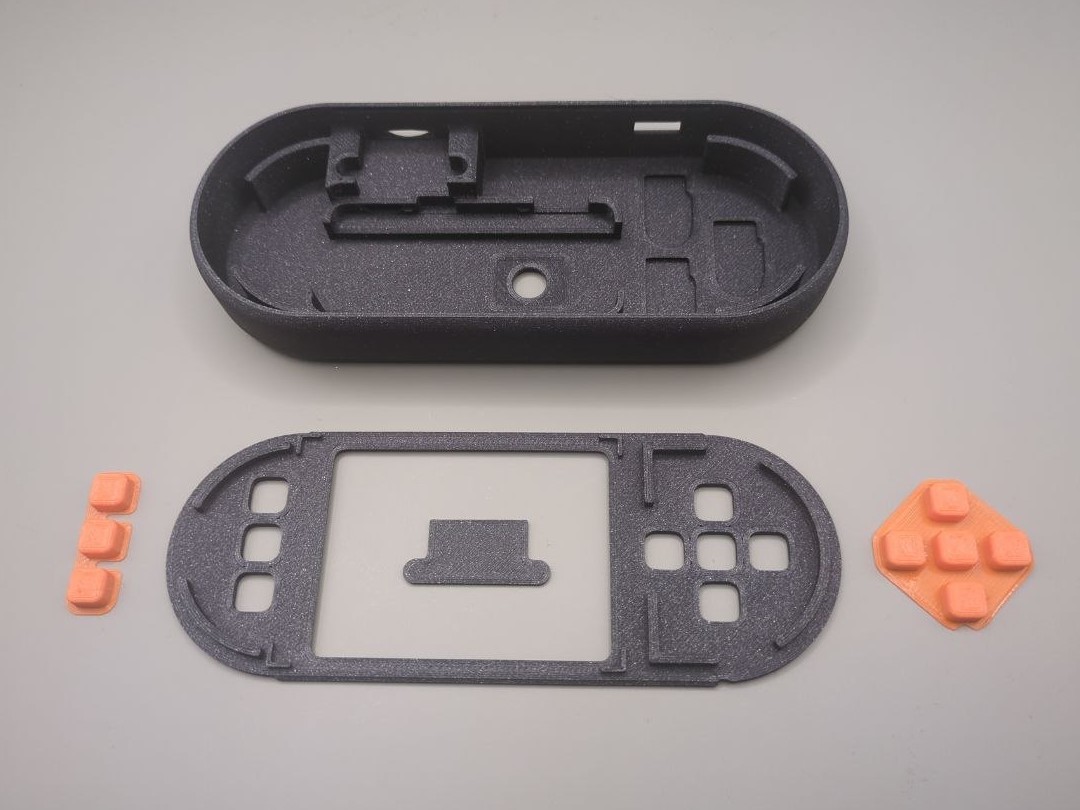
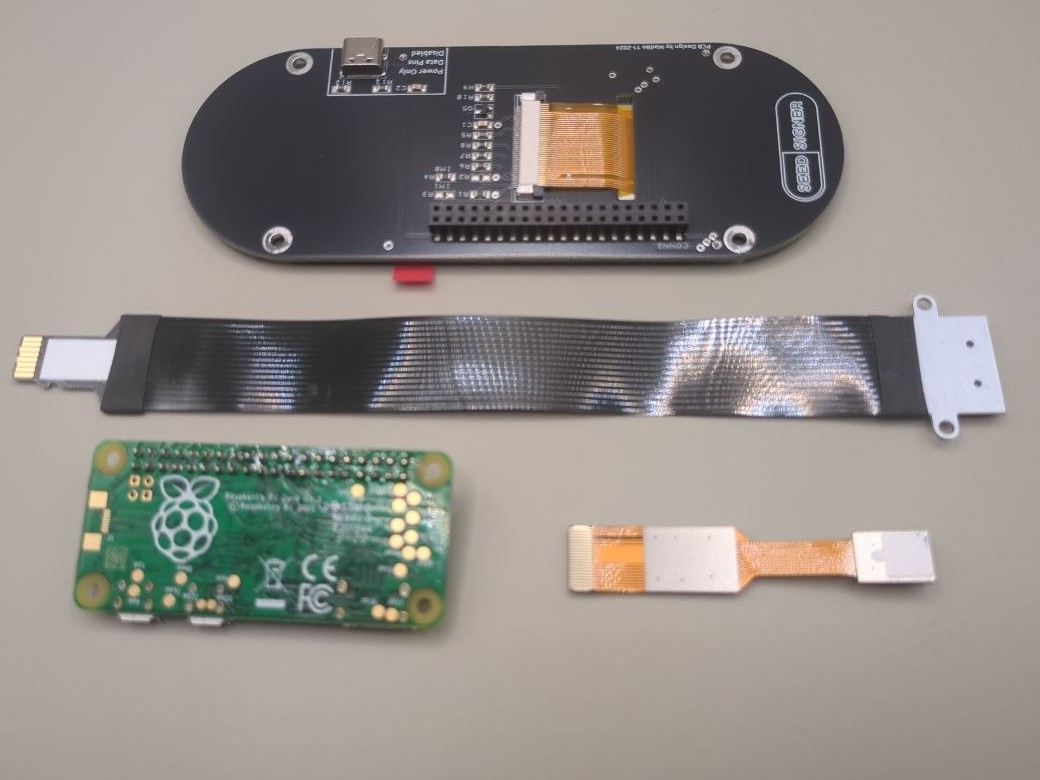
Seat the Pi Zero on the PCB header, connect the camera ribbon, drop the board into the shell, fit the faceplate and button caps, route the microSD extension. Small screwdriver, no soldering, about 30 minutes.
Download the current SeedSigner release from github.com/SeedSigner, verify the signature, write the image to a microSD card and click it into the slot. This is the one step that stays in your hands on purpose.
Roll dice, photograph entropy with the camera, or scan an existing SeedQR. Write the words down — on paper for now, in steel later. The device forgets them the moment you switch it off.
Show the xpub as a QR and scan it with Sparrow, Specter, BlueWallet or Nunchuk. From then on: transaction as QR in, check amounts and addresses on the big display, sign, QR out. No cable was involved.
Step by step with screenshots: Setting up a SeedSigner. Thinking about sourcing parts yourself instead? Build your own SeedSigner: parts list.
21Drucker.Farm is a small 3D-print farm in Germany. We print the SeedSigner+ cases on Prusa and Bambu Lab machines, inspect every part, and assemble the devices by hand. Every assembled SeedSigner+ is powered up and tested before it ships — camera, display, D-pad. Small batches: if a colour is sold out, the next batch is usually days away, not weeks.
What we deliberately do not do: we never ship a microSD card with software on it, and we never see your seed. A signing device with a pre-installed image would ask you to trust us. The SeedSigner project recommends against that, and so do we — flashing your own card takes ten minutes.
Orders ship within one to three working days with DHL. You can pay with Bitcoin over Lightning or on-chain through our own BTCPay Server (7 % off), or by card or PayPal. Questions before or after the purchase go to service@21drucker.farm and are answered within 24 hours. Returns follow the statutory 14-day right of withdrawal.
It is the unmodified SeedSigner release, executed as WebAssembly in your browser; only display, buttons and camera are wired to the web page. Nothing is sent anywhere. One rule, in red letters on the page itself: never enter a real seed into a web page. A public test seed and a demo transaction are one click away.
It runs the official, unmodified SeedSigner software and follows the same principles: open source, air-gapped, stateless. The “+” is a community hardware variant with a larger display board and D-pad instead of the 1.3-inch Waveshare HAT and joystick of the classic build. The SeedSigner project itself does not sell hardware; every device on the market comes from independent builders like us.
If you want to use it tonight and would rather not handle a ribbon cable, take the assembled device: it arrives tested, you only flash a card. If you like the idea that every part of the device that signs your Bitcoin has passed through your own hands, take the kit — it is the same parts for less money and half an hour of your time. There is no soldering in either case.
Because a signing device with a pre-installed image would require you to trust the seller. You download the SeedSigner image from the official GitHub repository, check the signature and flash your own card. That way nobody — including us — has had a chance to tamper with the software that handles your keys.
No. Only the power lines are connected on the SeedSigner+ board; the data lines are not wired. The port charges nothing and talks to nothing — it just powers the Pi. Any USB-C cable and a phone charger or power bank will do.
Everything that speaks animated QR codes for PSBTs: Sparrow, Specter Desktop, BlueWallet, Nunchuk, Electrum with the right plugin, and multisig setups built from them. The SeedSigner+ shows the same QR formats as every other SeedSigner because it runs the same software.
About 30 minutes. A small Phillips screwdriver is the only tool; the Pi Zero's header is already soldered, so nothing needs heat. The trickiest moment is seating the camera ribbon cable in its connector — pull the latch out gently, slide the cable in contacts-down, push the latch back.
Not at the moment. The SeedSigner+ board is sourced in small quantities and we only sell it as part of the kit or the finished device. For the classic SeedSigner we print the OpenPill case on its own — see the SeedSigner overview page.
Germany, the whole EU, the UK, Switzerland and Norway, with DHL, within one to three working days of payment. You get a tracking number by e-mail. Shipping costs are shown at checkout before you pay.
Fully assembled or as a kit — both SeedSigner+ options are in the shop with live prices and stock.